Beth and Richard in Oregon

In June 2010, we (Beth & Richard) moved from San José, California to the outskirts of Cottage Grove, Oregon. This simple blog provides some history and an ongoing record of our new life. [Regarding "Terribly Happy" — Hitchcock's Rebecca (1940).]

Sunday, July 14, 2013

Mulch!

It’s been a long time since our last post. We’ve been busy, but mainly we've just been lazy bloggers.

Mulch has changed my life.

A little exaggeration there, but mulch HAS changed the face of Terribly Happy, and helped fortify our trees, shrubs, and other plantings.

Mulch is placed atop soil to provide one or more of the following benefits:
* slows soil evaporation, so less irrigation is needed
* insulates soil, so soil temperature doesn’t change as much and doesn’t freeze or cook as easily
* provides raw materials for decomposers (worms, etc.) to generate future soil
* inhibits weeds, and may make pulling weeds easier
* minimizes yard waste

Secondary, but significant, benefits accrue directly to the orchardist or gardener (e.g., me): less time and money spent on irrigation, weeding, frost protection, etc., and thus lower overall stress levels. For example, in 2013 this part of Oregon had its driest January-May on record, yet I didn’t start irrigating until late June because mulches kept the soil cool and moist.

Mulch has to be able to transmit air and water, so solid plastic sheeting doesn't qualify. Lots of other things do, though; here's a semi-complete list of mulches we've used recently with information about sources, collection, and other stuff.
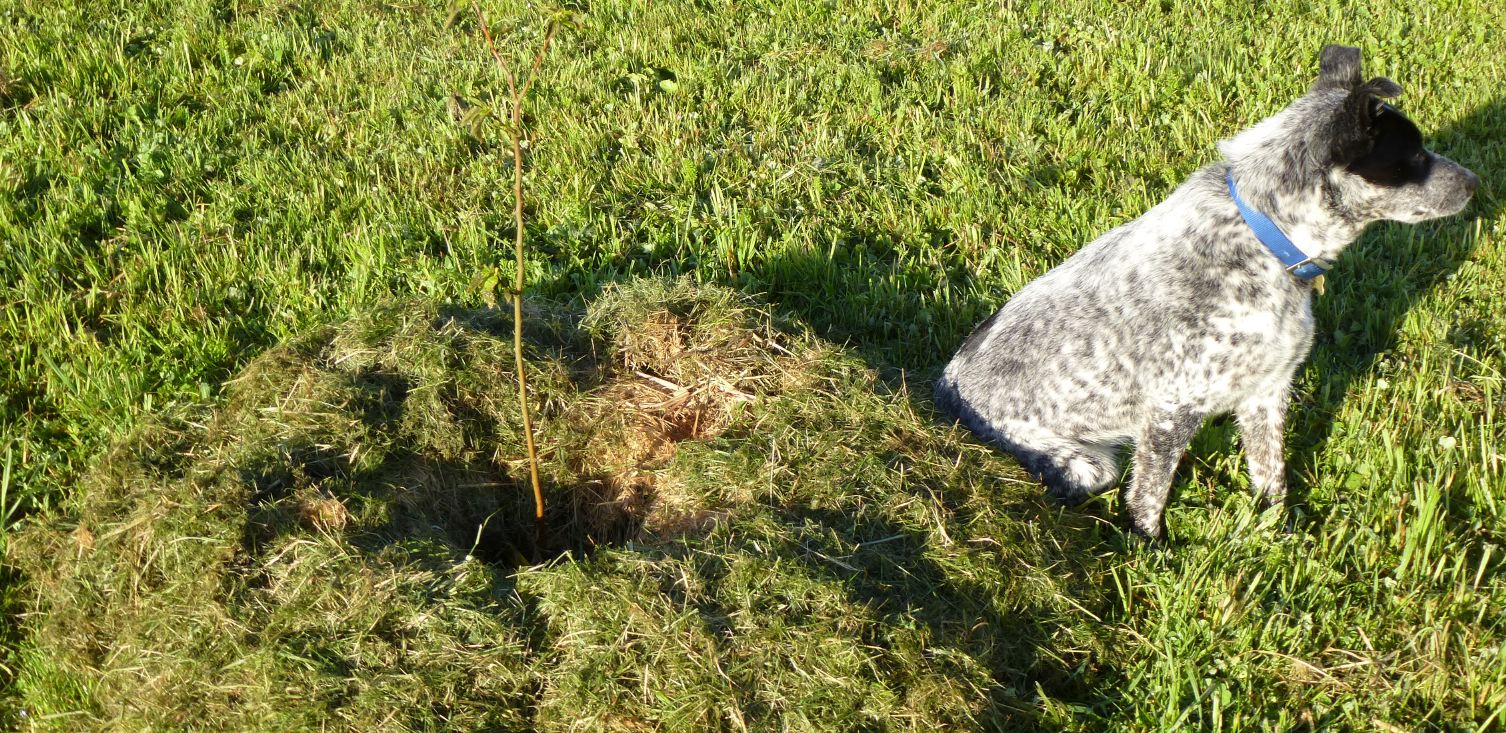
Grass cuttings

Source: orchard, other grassy areas of property

Collection: ugh. raked piles (no collecting bag on the mower, yet), wheelbarrow as needed

Available: Mainly Apr, May, maybe June; key springtime mulch


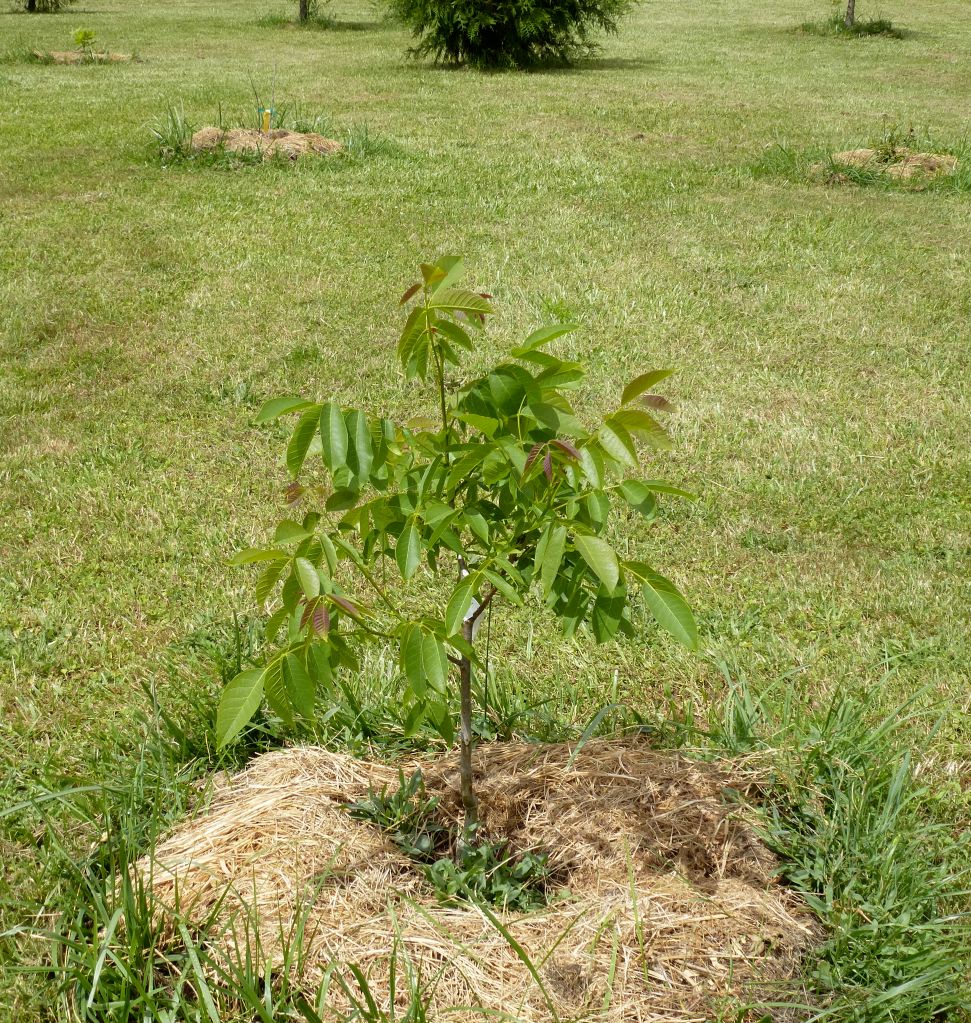
Top: Grass ring w/Sherlock

Bottom: several small trees w/mulch rings (walnut in foreground)


Chop-and-drop cover crops

Source: warm-season (buckwheat) and
cool-season (rye/vetch/fava mix) crops
that I planted and scythed down. No
tilling--they just decompose in place.

In this photo, I haven't yet moved the
cuttings to the mulch rings around the
key plants.


Other organic matter (no pictures): weeds and plant trimmings: thistles, dandelions, grape vines, comfrey (planted mainly for this use), tree suckers/water sprouts, etc. The few types that re-root (damn bindweed) go the dump or are burned.

Leaves

Source: Mainly the oak trees from the neighbors across the street. Sometimes they pick up and dump piles for me, but usually I go over with a rake and an old sheet and drag them home!

As time goes by, our trees will mature and we'll have an increasing supply of our own leaves.

Top: Thin leaf pile around a baby chestnuts; needs a lot more mulch.

Bottom: Sheet mulching w/leaves


Straw

Source: purchased bales; too pricey to do this regularly unless purchased in bulk (as I did for the pictured project).

Be sure to get straw and not hay, which is seed-filled.


Sawdust and peat moss

These materials aren't good for all plants, but blueberries love them.

The sawdust came from a local, small-scale mill.

The peat moss was purchased at a nursery.


Chopped cypress foliage

Source: A cypress on the property that we felled because it was growing like a weed....a 25-foot-tall weed that blocked our view from the back deck.

I painstakingly trimmed off all the foliage with pruners.


Grape pomace

Stems, skins, and seeds hauled in from a local winery (11 tons!) Half was used in compost, and half was used in a sheet-mulching project. We didn't expect the long-term viability of grape seeds. Fortunately, young grape plants are easy to pull out.

Top: Pomace close-up.
Bottom: Sheet-mulching project underway; grape pomace partly covered by straw in foreground.


Horse manure (no picture): An adjacent neighbor supplies us with horse manure (dung + straw) periodically. We store it in the barn for a year to let it dry out, then use it in the compost pile or as a mulch. When used as a mulch we cover it with other mulch types to deter scavengers.


Newspaper and cardboard

These decompose within about six months (of wet weather), interfering with most weeds and giving new plantings a head start.

Top: Part of a sheet-mulching project (later covered with bark mulch)

Middle: Torn-up cardboard that I covered with straw and grass, and into which I then hand-sowed buckwheat.

Bottom: Newspaper & cardboard as part of sheet-mulching.


Pea gravel, bark mulch, wood chips from a local materials yard.

Decomposition rates range from slow to zero (pea gravel), but each has its uses.

Pea gravel is especially easy to work with and weed, and discourages field mice who might munch on a young tree trunk.


Finally, weed fabric is an effective weed deterrent. I used it on fairly mature apple and hazelnut trees in the orchard, and my weeding time on those 60 trees is now negligible. Not sure whether I would ever do it again, though. It transmits air and water, but prevents the development of any kind of organic matter.

Recommendations: Construct mulch rings around any tree or shrub that matters to you. The radius of the ring depends on the size of the plant and availability of mulch (I'd have made my rings thicker if I had more mulch). Maintain a thickness of at least 4” (most of my mulches are 5-8” thick); how quickly your mulch decomposes depends on temperature and precipitation. If you have to irrigate, do so under the mulch (w/drip, hose, etc) to help slow mulch decomposition. Most guides specify a mulch-free zone around the trunk to avoid disease, but in cold winters it’s probably better to pile the mulch around the trunk and then move it away as the weather warms.

You'll find plenty of "mulch advice" in online articles and forums. Good luck!


Wednesday, January 23, 2013

House remodel

This post isn’t about sustainable living in the strict sense: No rainwater catchment, or organic gardening/forestry, or chickens, etc. But it IS about sustaining ourselves—via a house that keeps us sane and calm while we lead our Terribly Happy life.

We knew when we put in an offer on this property that the house needed a major remodel. We accounted for it in our long-range budget, and were fortunate that the inevitable hiccups we encountered did not bring us significant fiscal pain (at least, no more than we were expecting).

We worked with Rainbow Valley Design & Construction, one of the premier outfits in this region. While they aren’t the cheapest, they’re really good, and we are really happy with the results.

Rather than go through too much step-by-step, I’ll provide mostly before & after shots, with occasional in-progress photos.

First, the floor plan. The upper diagram shows what we started with; on paper it's hard to tell just how user-unfriendly the west half of the house was.
The lower diagram shows what we ended with. It looks so clean and simple this way! Of course, it wasn’t. I avoided much of the havoc because I was in San José so much of the time, but Beth had to live with it constantly. She enjoyed it, for the most part.

On to the before and after pictures, with some explanatory text.
The view from the front door (location A on the floor plan).
We squared off and raised the strange curved arch between the two front “rooms” (partly to protect my head, but mainly for aesthetic reasons), and removed the top half of the wall between the sitting room and the kitchen.

The view from location B, not far from A.
We closed up a door leading into the master bedroom (and had the Tulikivi masonry heater installed; see separate post). Otherwise, the only changes to the east half of the house were cosmetic: painting, refinished floors, new bookcase.

The west half of the house was completely gutted, down to the exterior walls.
• Many interior walls were removed, with new ones built elsewhere.
• Most doorways were filled in, and several new ones were added.
• Many windows were filled in, and new ones added elsewhere.
• The pantry sink was removed, the water heater was moved, the guest bath was moved, and the master bath was redesigned, involving lots of plumbing work.
• All the interior walls were insulated (so was the floor, finally; what were people thinking?!).
• And some other stuff happened.

Including—how could I forget—a complete reconstruction of the kitchen.

From location C (door to sitting room) (yes, these are exactly the same view):

From location D (SW corner of kitchen) (not quite exactly the same view; unmoved doorway to front of house outlined in green):

Changes to the kitchen included (incomplete list):
• Arch removed, low ceiling raised.
• N wall (with master bath) moved N by five feet.
• Doorway removed/added in W wall; window in W wall of kitchen removed
• Island added w/propane line to rangetop and hood that vents through roof; oven is separate, against exterior wall.
• Old brick chimney and wood-burning stove were removed.
• Upright refrigerator removed; chest freezer modified w/simple thermostat to be a chest frig (works great!! saves energy, keeps food at constantly cold temps much better than any upright; ask us if you’re interested in details).
• A bunch of other things happened, but this list is long enough.

Some other shots before & during the remodel.
Old wood-burning stove and chimney: These, plus the visible walls and door, all were removed.

Some asbestos in the flooring. Sigh. Pricey hazmat removal required.

A makeshift kitchen in the front rooms. Using a campstove indoors for several months isn’t exactly recommended (“don’t try this at home” …. ooops), but it worked out OK. Beth lived with this the whole time; Richard was in a small apartment in San José most of the time, with a small kitchen (and nearby Thai restaurant).

Various stages of tear-down and re-framing walls and doorways.


A tiling master craftsman at work on the shower in the master bathroom, and the finished product: A little over the top for our humble place, but quite an eye-catcher.

Installation of the Marmoleum flooring in the kitchen. Each of the new rooms ended up with a different color of Marmoleum.


Installation of the “engineered-stone” countertops.

What can’t be shown photographically is how much more usable the western 1/4 of the house now is. That’s the home of a mudroom, hallway, guest bathroom, and two usually-empty guest rooms. So if you’re thinking about visiting, yes we have room!

Wednesday, December 19, 2012

Home heating: Wood-burning Tulikivi

By the time we were partway through the search for our Oregon home, we had decided on our preferred heating source: wood, burned in a highly efficient masonry, stone, or ceramic heater. Wood is abundant in the Pacific Northwest, and capable of being used sustainably (if trees grow at least as fast as we fell them for wood products). We settled on a Tulikivi heater, which is crafted from soapstone (talc schist to geologists), a rock with marvelous heat-related properties that make it ideal for our plans. [Check out the Wikipedia page on soapstone for more information, or this link
for more information about Tulikivis specifically.] Another attraction for us: The Tulikivi's high-efficiency combustion greatly reduces emissions of all types compared to a typical stove or fireplace.

As we toured houses in our search, we made “fitting in a Tulikivi” a primary consideration. Once we had decided on Terribly Happy, I contacted Uwe Mirsch, who is Tulikivi’s representative in the Pacific Northwest. He could have lived in Seattle. Or Portland. Or Boise. Or a thousand other places. But he and his family live outside…Cottage Grove! ¡Que bueno!

The house at Terribly Happy came with a furnace/duct system powered by fuel oil, a non-renewable fossil fuel that had to be trucked in, with cost and availability completely out of the homeowner's control. After Uwe installed the Tulikivi by the end of August, we could regretlessly(?!) remove the existing furnace and fuel-oil tank (necessary to provide room for the rainwater catchment; see separate post) and duct system (necessary to provide access for the insulation installers….yes, this house had no insulation in the floors!).

Because the Tulikivi weighs so much, Uwe had to cut through the floor and install support piers. Here’s what that looked like before he covered it.

After covering, and before the heat shield on the wall went up:

The final installation, including the heat shield:

I missed the entire process because I had to return to San José, where I was still chair of the Department of Geology. When I came back in the fall, though, I got on very close terms with our Tulikivi heater.

A key step remained: insulation of the floor. Estevan Slaughter and crew installed R-30 (or so) insulation in late winter, and overnight (literally!) the amount of wood required for a given internal temperature was cut by 50%! Shazam! We love our Tulikivi—and Uwe and his family, who have become good friends of ours.

One final note that, though not related to the Tulikivi, fits in here because of physical proximity. Check out the wall to my left as I hug the Tulikivi in the above picture. Nothing there. Now check out our nifty bookcases and "home-theater" setup!

Thanks to Kerns Cabinets of Eugene for this. Staining it is another of our upcoming winter projects.

Tuesday, December 18, 2012

Fence & deck

Among the many changes in our first year at Terribly Happy were modifications to the deer fence and the back deck. The first was a necessity for successful food-growing; the second improved our mental health!

When we moved in, the northern half of the four-acre property—the orchard—was surrounded by an eight-foot deer fence. It wasn’t electrified, but it did have barbed wire in its upper part.

The main access to the orchard from the house side of the property was a ponderous, old white gate.

As we undertook expansion of Beth’s kitchen garden and establishment of Richard’s forest garden (see separate posts), both of which were outside the existing deer fence, we faced a decision: Do we erect separate fences around each planting that we want to protect from the abundant deer, or do we fence the entire 4-acre property? We settled on the latter choice, and are terribly happy that we did.

The fencing crew started by taking out the east-west fence that separated the orchard from the rest of the property; this included the white gate and another, smaller, pedestrian gate.

Then they enclosed the southern two acres, reusing the fencing and pedestrian gate they had removed and completing the job with new materials.

They put in vehicle gates at each end of our U-shaped drive, plus a pedestrian gate near the mailbox.

Now, though deer patrol the yards of many of our neighbors, we never have deer problems. Even when we forget to close the gate at night (very rare), there’s no damage. They seemed to have learned to direct their attention elsewhere.

Shortly after the fencing job, the same company expanded our back deck so that it would be usable for dining and relaxing. Here’s what the deck area looked like just before we moved in:

We doubled the size by adding a section that sticks out towards the forest garden,

giving us great views of our place as we dine (or wine).

Barn, shed, and shop

Like many rural properties, Terribly Happy includes many structures that serve a variety of purposes. The major structures are the barn, house, and shed.

The house is the subject of other posts; this one focuses on the barn and shed.

The barn is big and (mostly) red.

It was originally a dairy barn, but probably has been used for miscellaneous storage for decades. These photos show how John (top) and we (bottom) have used it; note that we covered most of the openings in the far (northern) wall to keep the rain out.

About 20 or 30 years ago, a fire started inside that scorched many of the timbers, but it was extinguished quickly and structural integrity of the place is sound.

So far, we’ve used it mainly for storage, but we  also constructed a cool-storage space within it, as these before and after shots show.

The shed was (note past tense) a ramshackle affair built from whatever pieces of lumber seemed to be handy at various times in the past. Some of the posts consisted of three or four short pieces of 4” x 4” nailed together, most posts were more than halfway off their concrete piers, and cross braces had been added at random. It was a windowless structure with 6 openings, or “bays,” on one side.

It hadn’t been painted in a long time, so the wet Oregon winters were taking their toll on the wood.

For most of our first year, it housed the Prius, the pickup, and the 1948 Ford tractor and attachments that came with the place, plus other random stuff, lots of it junk, that had accumulated over time.
The enclosed section on the right is a chicken coop that, though structurally part of the shed, was salvaged during the demolition of the shed.

Hazen Parsons and crew agreed to tear down the shed in return for the tractor and attachments. The process is more accurately called “deconstruction,” because we salvaged much of the original timber—two-bys and 4” x 4”s that are significantly thicker than the slimmed-down stuff that’s been in use for the past 50 years. Some of that wood was donated to a wood-working neighbor; some has been re-used on later construction projects on Terribly Happy; some of it has been (or will be) sawn for firewood in our Tulikivi burner (see Tulikivi post).

Exterior removed (plus a view of the tractor)

Prepping for pulldown

Attaching to trailer hitch

Starting to fall...

Down -- with dust! Nice photo, Beth! (She took all of these—Richard was in San José at the time)


Some of the deconstructed lumber.

Once the site had been cleared, the concrete guys used their laser and tapes to map the area of the future replacement shed. Then they excavated holes,

inserted pre-formed rebar cages,

and added wood forms atop the cages.

Then, on a very muddy day, the (very heavy) mixer truck delivered concrete that was poured into the forms.

The steel for the new shed had been delivered earlier,

but we missed the actual construction because we were both out of town when the steel guys did their thing. This is what we saw when we returned

Hazen and the steel guys managed to tear down the old and construct the new without disturbing the original chicken coop, which now sits sheltered under the north end of the shed.

The center of the shed is now the home of a workshop, constructed by Estevan Slaughter and crew. After opening the doorway in the barn wall that you see at far right, they constructed a concrete pad atop the 3/4” gravel,

framed a 16’ x 16’ structure,

and finished the exterior, doors, and windows.

Later, Dave Shoemaker helped Beth insulate the interior with recycled denim (and bits of styrofoam).

Dave put up plywood interior walls, and constructed three worktables (he’s posing with one here).

The shop has been complete for several months, but we keep putting off the final step: consolidating our tools, which have been living in the barn, or the shed, or the house, or wherever we happen to leave them! A good chore for the rainy Oregon winter.