Beth and Richard in Oregon

In June 2010, we (Beth & Richard) moved from San José, California to the outskirts of Cottage Grove, Oregon. This simple blog provides some history and an ongoing record of our new life. [Regarding "Terribly Happy" — Hitchcock's Rebecca (1940).]

Monday, December 3, 2012

Edible Forest Garden 4: Zones 2 & 3

We transformed Zone 1 of the Edible Forest Garden (EFG) earlier in 2011 (see other post); I figured that we would take similar steps (straw, cardboard, etc.) in zones 2 and 3 in spring 2012. I wasn’t looking forward to it—all that cardboard, compost, and straw on an area 3 times the size of zone 1. But I was resigned to it.

Then serendipity struck. A friend in town learned of a winery that wanted to responsibly dispose of many tons of grape pomace—the skins, seeds, and stems discarded during the wine-making process. Beth and I figured “free organic material—our compost pile will be happy” and told him to start bringin’ it. He delivered it using a borrowed pickup and trailer, and Beth and I started piling it on top of some straw bales to develop a compost pile.
 

But then Beth had an intriguing idea: How about spreading the pomace atop the grass in zones 2 and 3, and thereby get a head start on building up the organic content of the soil? That girl is clever!

So that’s what we did. Ultimately, she and I pitchforked about 11 tons of it: about 4 onto the compost pile (which turned out not to work too well—too many seeds, not enough other stuff), and 7 onto the lawn. Not so fun for my shoulder (labrum tear etc repaired in 2007; current condition includes rotator cuff and labrum tears), but we got it done.
Some grape pomace atop the lawn
Grape pomace covering the lawn, except for future paths
I forked whatever straw we had left onto part of it, plus some oak leaves from the property across the street, then let it sit there for two months, slowly decomposing in the rain—or hibernating in mid-January under 6” of snow (the only snow we got that winter)!

Starting in late February, zones 2 and 3 underwent massive change. By the end of March, the insightful, Popeye-like Dave Shoemaker and I had done the following:
• planted about 50 new trees and shrubs (ranging in size from 1 to 4 feet high)
• transplanted 25 figs & honeyberries from elsewhere on the property to the EFG
• treated the roots of all these with mycorrhizal fungi to promote nitrogen fixing
• mulched all plants with pea gravel
• raked away all of the grape pomace (! thanks Dave!)
• put cardboard down in some areas
• sowed some cool-season cover crop in the other areas (better late than never)
• re-spread the grape pomace, then covered with straw (mostly) or leaves
• laid plastic and 3/8” minus gravel on all the paths

New plants and transplants with light-colored pea-gravel mulch circles.
Straw, cardboard, leaves.... some experimentation with mulching.
Same area as above, but with paths!
Note cardboard at front right, and green Zone 1 in the distance

By the end of June, the core of an irrigation system had been installed (see separate post).

In late spring, I sowed buckwheat seed throughout the entire EFG. In early summer, it really took off in zones 2 (especially) and 3, making the place look wild, and nearly obscuring some of the paths completely.

 
My nemesis bindweed started to overtake the buckwheat in late July, weaving its tendrils up the fragile stalks and causing them to collapse -- still alive, but growing sideways.

All the trees and shrubs that I planted in the winter were very happy this season—most doubled or tripled in height, and doubled to quintupled their above-ground mass. Here are some typical views of part of the EFG in late September, including plant names.

Some even produced a little fruit (figs & honeyberries). But I don’t expect first harvests from the others until next year or 2014.

In early October, I scythed down the cover crop, raked away all the organic-matter cover debris, pulled out surviving weeds and grass clumps, sowed the cool-season cover crop, watered, sprayed the bindweed :(, and covered everything back up. After two months, the cover crop is 6-12” tall. With luck, the bindweed will be greatly reduced next year. We shall see.

Edible Forest Garden 3: Zone 1, year 2

We transformed about 1/4 of our 12,000-square-foot lawn in early spring of 2011 (see separate post). This post looks at its progress in 2012.

In early June 2011, the forest garden looked like this:
Small plants with 3-4” of bark mulch spread everywhere.
The bark mulch covers interlayered straw, compost, newspaper and cardboard; the goal of this sheet (or “lasagna”) mulch project was to kill the lawn and encourage worms and other helpful life forms to start producing a healthy humus layer….grass roots produce diddly.

I decided to plant a cool-season cover crop—oats, vetch, bell beans, etc. I hoped these plants would (a) grow (slowly) during the winter and spring, (b) break up the previously grass-bound soil with their roots, and (c) provide biomass to the developing humus layer when they died.

In late October 2011, I raked the bark mulch to the side, scored the soil with the rake,
sowed the cover-crop seed by hand, and then lightly raked to cover the seeds (most of them, anyway) with a thin layer of soil. I left the bark mulch “dikes” where they were, for the time being.

By mid-November, the cover crop was a few inches tall—not a jungle, but at least it had a small head-start on winter.
Lesson learned for 2012: Plant the cover crop earlier.

Throughout the winter, this batch of hardy plants continued to grow slowly. By mid-March, it was over a foot tall.

Then came the warmer days of early spring, and the stuff shot up. Two feet high by mid-April:

I scythed it down and left in place to decompose and feed the soil. Most farmers who plant a cover crop till it under to minimize losses to the atmosphere, but not here—any tiller would compact the forest-like soil I’m trying to develop.

Anyway, the stuff kept growing—about two feet in a month! I scythed it down again in late May,

and planted buckwheat, which thrives in the warmer months. The buckwheat grew vigorously through July, and I scythed it down twice. It went to seed in early August, and partially self-seeded a second late-summer crop. However, I didn’t water it much in late August and September, so it faded a bit.

Here is a series of pictures taken from the same spot on our back deck at different times of 2012:
 

In the first week of October, I sowed another batch of cool-season cover-crop seed. Two months later, it’s only several inches high, but I’m confident that it will be at least as vigorous as last year’s. Meanwhile, the soil has become much lighter, thicker, and healthier (worms!) than in early 2011, so it’s well on its way to supporting a forest garden.

Edible Forest Garden 2: Zone 1, year 1

Mission: Get started on transforming the north-side lawn into an Edible Forest Garden (EFG). See the post Edible Forest Garden for more background.

In early spring 2011, we transformed only the western quarter of the lawn area—what we call Zone 1. After lots of reading and online sleuthing, I ordered small plants that would, I hoped, grow into trees and larger shrubs. Groundcovers and small perennials would come later.

When the plants arrived, we got to work. First, I set the cutting deck on the riding mower as low as it would go, and cut the lawn down to the soil line where possible. The goal was to shock the grass and convince it to not bother trying to regrow. Next, I scattered some pelletized dolomite to raise the pH of the soil (ours is mostly 5.5-5.9; 6.0-6.5 is my goal). Then I pitchforked (just “forked” if you want to be rural-hip) about 50 bales of straw, making a layer about 4” thick, and added the grass clippings and some wood ash.
Straw and clippings atop "scalped" lawn

Then Beth helped me distribute about 1-2” of prepared compost on everything, using a clever technique with a square piece of plywood.
 
By the way, this was early April—typically a rainy time here. 2011 was no exception!
 
Then we planted our trees and shrubs, which (at the time) were tiny things—nothing bigger than a 1-gallon pot, and most much smaller than that. We put down wet newspaper (10-15 sheets thick; we should have doubled that) around the plants.
We laid newspaper around the plant to avoid plant damage by the stiffer cardboard.

Then we spread cardboard everywhere, overlapping their edges and the newspaper to inhibit weeds. The cardboard came from our moving boxes, boxes associated with the house remodel, and boxes we scavenged from local stores.

Finally, we covered everything with about 4” of bark mulch, put black plastic down on the paths, and covered with the plastic with 3/8” minus gravel (we highly recommend this—our paths are holding up really well).
 

This was in early April 2011, so we had plenty of rain over the next couple of months. That kept everything moist, and spurred the decomposition of the newspaper and cardboard. In fact, the soil stayed moist throughout the dry months of the summer! Quite impressive.

When it came to weed suppression, the cardboard did fine with dandelions, groundsel, etc., but it couldn’t stop the bindweed, an insidious invasive that is very, very difficult to eradicate. Be thankful if you’ve never encountered it, and commiserate with me if you have. It popped up all summer long, but was only a moderate nuisance. In fact, the bindweed has been declining due to the subsequent work in the EFG (see other posts).

Edible Forest Garden 1: Intro

When we moved here to Terribly Happy, the north side of the house was an expanse of lawn with scattered trees.

No matter how pseudo-pastoral (or whatever one thinks of it), I had plans for it from the first day we toured the property: an Edible Forest Garden (EFG). An EFG, or “food forest,” is a permacultural term for a forest that (a) humans design, plant, and cultivate, (b) more or less sustains itself after a number of years because of the humans’ wise (!) planting choices, and (c) provides its human caretakers with nuts, fruits, greens, and possibly medicinals, as well as a beautiful forest environment.

EFGs aren’t very common (yet). Because of that, and because they’re a long-term undertaking, I think of this as an open-ended experiment guided by some basic principles but not by specific how-to steps. Great! Stimulating stuff for my nerdy brain.

OK. So we want a bountiful woodland or forest with a thick forest-floor humus layer yada yada yada. What we BOUGHT was a lawn. Grass makes crappy, dense soil with little organic matter and few worms or other desirable critters. So I set two immediate goals for the EFG: (1) Design it, and put in plants that will become the larger trees and shrubs. (2) Improve the soil.

I read Edible Forest Gardens by Dave Jacke & Eric Toensmeier (2005), a two-volume, 900-page compendium. In fact, I read it twice, and parts of it many times. Though all of the EFGs they describe are in the eastern half of the country, so some plant choices might not apply, it helped me get started.

Here was an early design plan:

Then I planned specific trees, and how they might look 20 or even 50 years from now:

I went through several iterations of this plan before settling on a final version. Even that one has been modified since I started planting and transforming, and no doubt I’ll be making some unanticipated changes as time goes by. For now, though, this is the “20-yr-plan.”

In 2011, only the western quarter of the area was transformed. We call this zone 1, and its progress is shown in two separate posts (EFG zone 1, Year 1 and EFG zone 1, Year 2). Work on the rest of the area—zones 2 and 3—started in November 2011 and occupied me for much of 2012. It has its own post (EFG zones 2 and 3).

For an appetizer, here are two pictures from roughly the same spot; the later one is from July 2012, just 15 months after we started the process.


Shazam!

Sunday, December 2, 2012

Elderberries

Before we moved here, our only exposure to them had been via Monty Python’s Holy Grail (“Your mother was a hamster, and your father smelt of….”). They were on Jacke & Toensmeier’s “Top 100 Forest Gardening” plants, so I purchased 4 babies in 1-gallon pots.
We planted the elderberries on 4 April 2011.

After the mulching, it was a bit hard to even see these small things. There’s one behind me and to my left (E), and a goumi—another berry-bearing bush—to my immediate left (G). Remember this pair!

This is what they looked like on 8 Nov 2011, seven months in the ground.


This is what they looked like on 7 June 2012—not even summer yet (three of them in this picture). Monsters! in the ground just 14 months.

They continued to grow during the summer, and the goumis grew even faster.
29 Sept 2012
A word about goumi, another entry on J&T's top-100 list: They produce edible berries, which we hope the birds will eat instead of the elderberries, blueberries, jostaberries, marionberries, cherries, etc. But their chief use in the forest garden is fixing atmospheric nitrogen into the soil. Although they were planted at the same time as the elderberries, they came in 6” x 2” “tubes” and thus took longer to establish themselves. More on goumi when they start to bear berries—next year, I hope.

Back to the elderberries, which are sambucus nigra (ripe berries are black). They grow to 20’ or more, but at that height they’d block our view of the orchard from the deck, so I’ll have to keep hacking them down every winter.

In 2011, the plants put out some berries, but we were too busy with other stuff to do anything with them. In 2012, though, as they shot to 8’, then 9’, then 10’ high, they put out huge, and huge numbers, of blossoms that begged for attention.
All the white and yellow blossoms will turn into berry clusters.


As the berries ripened, I started harvesting. They don’t ripen at the same time,

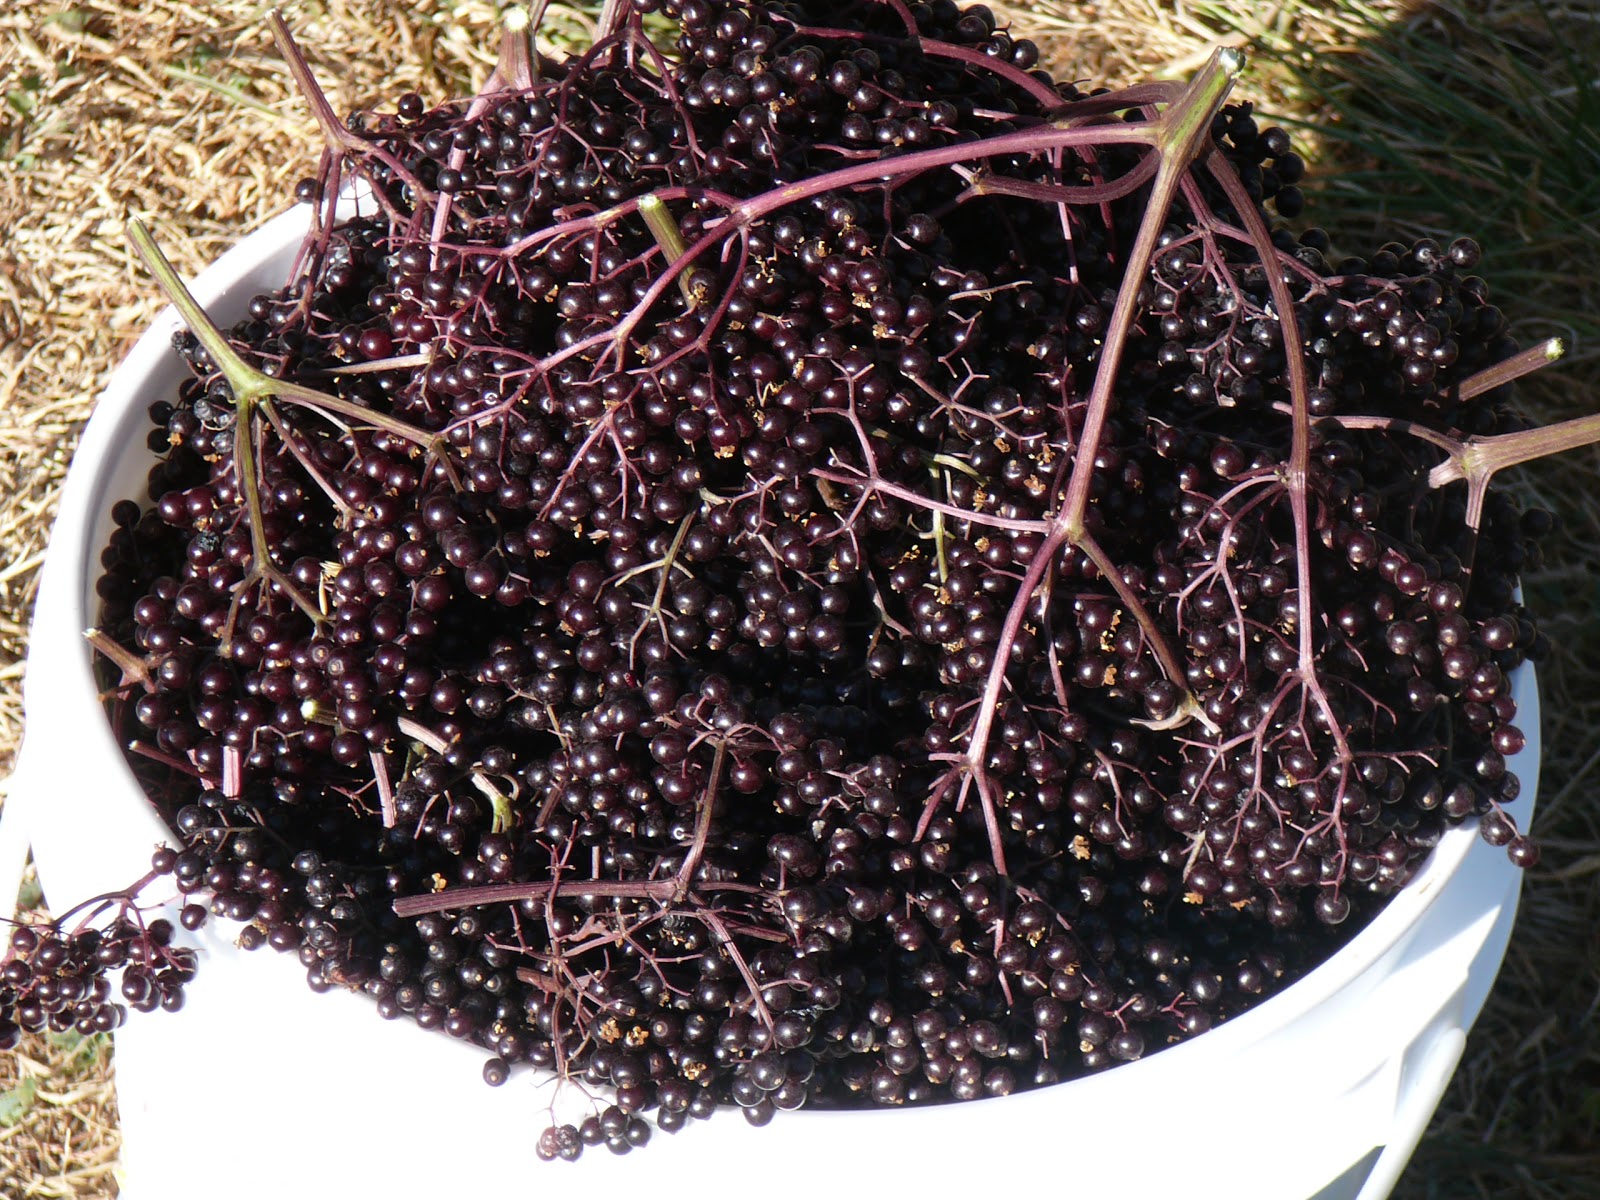
so I could clip off enough clusters to fill a heaping five-gallon bucket

and then go back and do it again several days later. I think I harvested five times altogether.

Pulling berries off the clusters is fast and fun. Place fingers on either side of a suitable stem, pull along (up) the stem, and the berries pop right off, if they’re ripe enough.

Still, lots of clusters + tiny berries = an hour to fill the pot.


Then the berries go onto the rangetop (in a different pot, with a non-stick bottom). Cook them at low heat, add sweetener. Beth experimented with sugar, honey, sucanat, and stevia, with results preferred in that order (Beth says "stevia was gross"). When cooked down for a shorter time, the yield is a yummy, runny syrup that suddenly made vanilla frozen yogurt worth eating. When cooked longer, the yield is a yummy jam that doesn't last long around here. Neither is too sweet, and both are flavorful.

Which makes us wonder: What is wrong with smelling of elderberries?!